I cannot believe I have been MIA from posting for two whole months! So much has been going on, and crafting has had to take a huge back-seat to real life.
Right now I can't sleep. Tomorrow is the first in my series of tests to find out if I have cancer. I keep telling myself that it is what it is. The cancer is there or it isn't. The tests won't change it, but they will give me knowledge to be able to fight whatever is going on with my body.
I have such a strong history of cancer in my immediate family. I have it coming at me from all sides. Thankfully most of them were strong survivors. I hope that is me, too. Most of all, I hope the doctors are wrong, and this is just one of those cancer "almost" had it stories.
No matter what, I have a great support system in place. Whatever the outcome, I will be strong, and I will come out the other side a stronger person.
Hopefully, I will be doing some crafting soon. Hubby spoiled me with some great crafting items to try to inspire me to create again. I am working at getting back in the grove. It is so hard to craft with a house full of family, but I am going to try to set aside at least an hour a day for "me" time.
Thanks, everyone, for your support.
Friday, November 05, 2010
MIA -- Wow, it has been 2 months!
Posted by BoxerBrats at 3:57 AM 2 comments
Tuesday, August 31, 2010
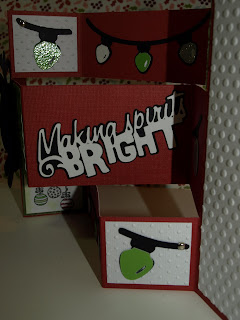
All is Merry & Bright
Whew! 30 cards in 30 days! Today's last card was a really stressful! After all of that work, I could not get it to upload. It literally uploaded as the clock clicked over to midnight! A second more, and I would have been out of the challenge! I think I need a drink!! Thank you, God, for the split second help :)
I am so glad Abby (the big boss of the challenge) was up and saw my card post in the very nick of time!
Anyway, today's card was a bonus challenge. We had to use red and metal. I did both. I went back to my favorite Create-A-Critter reindeer to end the challenge. This is truly a Provo Craft card from the front to back ;).
I used the Create-A-Critter cartridge, the Winter Frolic cartridge (sentiment), and then my Swiss dots and Polka dots Cuttlebug embossing folders.
Well, I will do the instruction for this card on request, if anyone wants them. I am so frazzled after my upload debacle, that I think I am going to go relax and watch a little television. Have a great night, everyone!
Posted by BoxerBrats at 12:21 AM 10 comments
Monday, August 30, 2010
Copic Mondays - Cricut & Copic Roses
Today's video will teach you how to make these cute and easy flowers using your Copic Airbrush system and your Cricut Expression!
Products Available from Cutters Creek:
Cricut Expression
Cricut Cartridges - Paisley, Forever Young, Sweet Treats, Cindy Loo & many more
Copic Airbrush System
Copic Sketch Markers ( I used R81 and R85 along with R29 and R89 for this video)
Glue Dots
Posted by BoxerBrats at 3:28 AM 0 comments
Labels: Copic Airbrush, Copic Markers, Copic Mondays, How-To, Paper Flowers, Paper Roses, Tutorial, Video
Sunday, August 29, 2010
Santa and His littlest Reindeer
Today's card is Santa and his littlest reindeer! This card was fun to make, and I really enjoyed using my two favorite crafting items -- My Copics and my Cricut. They are a great combination.
I started with a standard 4.25" x 5.5 inch kraft cardstock card. I went with a lot of layers on this one for depth. The papers were "busy" so I wanted them to have a bit more depth and definition. The solid layers helped achieve that goal.
The first layer is 4 1/8" x 5 3/8" cut in white cardstock. The next layer is 4" x 5.25" cut in kraft cardstock. Then my next layer is 3 7/8" x 5 1/8" cut in patterned cardstock. The band is cut at 3.75" x 4" with a white border paper 1/8" larger all the way around. The band is added to the card with foam tape.
Now for the fun part! Santa is cut at 3.5" using my Paper Doll Dress Up Cricut cartridge. I accented his layers using my Copic Markers and my Copic Multiliner pen. I also used the Multiliner pen to draw in the eyes and the glasses. My reindeer comes from my Cindy Loo Cricut cartridge. I didn't have the perfect color cardstock, so I colored her body in using my Copic markers. For an added extra, she had to have a googly eye. I put them together using Mono Liquid adhesive. I added them to my card front using foam tape for dimension.
Now to the inside. I wanted to make a gift card holder, so I cut a white strip of cardstock at 4" x 6". I finished the edge using my Martha Stewart double loop border punch. I thought it matched the patterned paper the best out of all my punches. I scored the bottom end at 2" and folded it over to make the card holder. I adhered the edges only using ScorTape. I added a 1 7/8" x 4.5 inch strip of patterned paper. I made it slightly wider so I could wrap it around. Next I cut the holly border, and airbrushed it to match with my Copic marker and Copic airbrush system. The little tag is cut using the Cricut cartridge Tags, Bags, Boxes and more. The kraft layer is 1.75" and the white tag is 1.5". I stamped my Papertrey Ink sentiment with Olive Pastel Colorbox chalk ink, and then lightly chalked the edges. I adhered the two pieces together using an eyelet and my trusty Crop-A-Dile. A small piece of twine completed the tag look. I added the pocket to my card with ScorTape, and then added the tag with foam tape. A nice Micheal's gift card inside, and the gift is complete :)
Have I lost you yet? I think the end of this Christmas Card Challenge is going to require a blog candy give-away. Stay tuned. I am putting together a great Christmas package for one lucky reader!
Posted by BoxerBrats at 11:12 PM 5 comments
Labels: Christmas Cards, Copic Airbrush, Copic Markers, cricut die cuts, Crop-A-Dile, Gift Card Holder, ScorPal, WRMK
Saturday, August 28, 2010
Pop-Up Penquin Card
I had a lot of fun making this card, but it did take me a lot longer to complete than I planned. The directions for this card came initially from Card Maker magazine. There were a few things that I had to figure out a bit further from the directions, and I did somethings using my Cricut instead of the Spellbinders dies.
To get started on this one, I cut a 4" x 12" piece of red cardstock. I used the Core-dinations red. I scored at 2" 4" 8" and 10" using my ScorPal. Then I marked the middle of the card 6" with a light pencil mark. For the folds to work out, be sure to be accurate on your measurements for everything. You are going to use the 6" middle markings on top and bottom to score an X in the middle section. Line your score mark with the top of the 6" and the bottom of the 4", then the top of the 6" and the bottom of the 8". Flip and repeat. You will end up with a scored X in the middle portion of the card. Fold all vertical lines as valley folds, and fold all diagonal lines as mountain folds.
I used my Cricut for the card front. You can use a number of cartridges to complete this project. The Accent Essentials, From My Kitchen, and Preserves cartridges all have scalloped circles and regular circle cuts on them. I set my machine on Real Dial Size. I used the Accent Essentials, and I cut my scalloped circle at 4.75". I repeated the cut with my Preserves cartridge, and it came out a little different with the same setting. I cut my center circle at 3.75".
I used my Inkadinkado stamp set and chose the penguin. I stamped him first on a post-y note to make a mask. I used Memento Tuxedo Black ink, because I planned to color my images with my Copic Sketch markers. I stamped the center penguin first centering him visually. I covered him with my post-y and then stamped his two friends. I added the snow mounds using my Copic 0.5MM Multiliner pen. I wish now I would have snapped pictures during the coloring stages to show you exactly how I created the feathered blue in the snow. I will remember that next time.
I colored the image using my Copic Sketch markers (colors listed at the bottom of this post). I placed the scalloped circle on top of the card for centering. (You want the scallops to cover the fold points when the card is finished). I adhered the stamped image to the scalloped circle using Mono Liquid Adhesive, because I wanted time to be able to be sure my image was centered correctly. I placed it aside so I could add randomd drops of Icicle Stickles for the snowflakes effect. I then added Liquid Pearls on centered on each scallop. I must admit that I need to work a bit more on my technique with this product. Some of my pearls are better than others.
I Cut four strips at 3.75 x 1.75" using patterned paper, and two strips of red cardstock at 1.5" x 3.5". I adhered complete strips centered on the outside flaps of the card. Layering red cardstock over patterned paper. For the folded sections, I marked the center of the remaining two patterned strips, and cut them at a diagonal. Placing the center mark and the corner along the paper cutter line. This gave me my long piece and my two triangle pieces cut perfectly for both sides. I adhered those on each side.
Next came the snowflakes and decorations. The snowflake brads, snowflake die-cuts and star punch out were all random items in my stash. I used clear Twinkle Jewels for added effects, and I adhered those using Glossy Accents. Lastly I accented all of my decorations with Icicle Stickles.
Once everything dried, I adhered my center medallion to the center square.
And there you have it! My very first pop-up card. Wow, now what to try next?? The challenge ends in just a couple of days! I have to pick something harder for my final card. Any suggestions??
As always, I would love to hear your comments!
Products used in this project are available at Cutters Creek:
Cricut Expression
Cricut Cartridges - Accent Essentials, Preserves, From My Kitchen (circle & scalloped circle cuts)
Copic Sketch Markers
- Colors used: 0 (colorless blender), 100 (black), B0000, B000, R17, R22, R27, R29, Y38, G05, G17, G20
Twinkle Jewels
Glossy Accents
Mono Liquid Adhesive
Core-dinations Cardstock
Ranger Stickles - Icicle
Liquid Pearls - White Opal
ScorPal
Inkadinkado Stamps
Memento Tuxedo Black Ink Pad
Other items - Patterned paper - red glitter snowflake Imaginisce - Snowy Jo
Snowflake Brads
Die Cuts snowflakes (2) & Die Cut Stars (4)
Posted by BoxerBrats at 10:54 PM 9 comments
Labels: Christmas Cards, Copic Markers, Core-dinations, cricut die cuts, Imaginisce, Liquid Pearls, Pop-Up Card, ScorPal, stamping, stickles
Friday, August 27, 2010
Day 27 - A little bit Country
Today's card draws on a bit of a country quilt kind of flair to me. It is made on white cardstock with a kraft cardstock layer for a border. The card front is smooth white cardstock with four patterned papers from the 2008 Snowy Jo Imaginisce paper line. I cut strips at just over 1" and then used the Fiskars Apron Lace Border punch on the edges. I mounted them on the card face using Mono Permanent Adhesive. I wanted a little "play" time to get them even, so liquid adhesive was the answer. The buttons were from Granny's now infamous button box, and good old DMV floss added just the right sewn on touch. I used Glue Dots to adhere the buttons to my faux quilt pieces. I added the eyelet lace using ScorTape, and then finished it off with American Crafts Ribbon. I added this great ceramic button that I purchased years ago at JoAnn's using twine. The sentiment is an American Crafts rub-on from their 2009 Christmas pack. The entire card front was adhered to the card base using foam tape.
I love this one actually. The hard part is picking who I will send it to! LOL The month of cards is drawing to a close. I am going to have to think up some cool card for my finale :) Stay tuned for more.
Posted by BoxerBrats at 11:00 PM 1 comments
Labels: buttons, card making, Christmas Cards, lace, ribbon, rub-ons
More Cards to Share & New Video Coming :)
I am a bit behind, again, in posting my cards for the challenge. I have been battling not feeling well for a few days now. I have good times and bad times, as we all do. It is just so frustrating when I am having troubles. But now to the important stuff ~ the cards~!
The card above was really fun to do. I used my new Winter Frolic cartridge that hubby picked up on eBay ridiculously cheap! I love when we accidentally find amazing deals. I cut the ornament using glitter cardstock in white, green, and silver. The green went well with this polka dot background from Imaginisce's 2008 Snowy Jo paper line. The chipboard is from Karen Foster Design - 2009 package. The ribbon is from Offray.
I made that cool ribbon treatment using ScorTape. It was super easy to do, and it looks so cool. I was thinking this technique would look great on a shabby chic card. I was thinking it would be cool to run a decorative or double stitch down the center of the pleats and then add buttons or something cool.
Now for today's card, I used the same die cut from the Winter Frolic cartridge, and I coupled it with a tree branch I found on there, as well. I cut the ornament this time using my Imaginisce Snowy Jo paper line, and then I added the accents cut with white and silver glitter paper. I set the ornament aside, and then covered the entire paper portion with Glossy Accents, and let it dry. I only put it on the patterned paper. I left the glitter paper un-covered. I found that cool pine needle stamp on an Inkadinkado stamp set I had. I traced the branch on the card in pencil, then stamped the needles, erased my lines, and adhered the branch. I trimmed it to fit the card. The sentiment was stamped using Bamboo leaves Memento ink on an oval cut from the Lacy Labels Cricut Lite cartridge. I punched a hole with my Crop-a-dile, then added the twine. I cut a small strip of plaid cardstock for the bottom (about 1"). I rounded the corners with my WRMK Corner Chomper (love this tool). When my ornament dried I added it with foam tape, tied on the tag and added the ribbon. I used foam tape to keep the tag in place. Viola! Day 26 is in the books :)
I also finished two card in my card pile. I am super late on sending a birthday card to two family members! I am so bad! I finished the masculine card. I do love how it turned out. Most of the stamps are Tim Holtz stamps. I used creme de chocolat Glimmer Mist and baby's breath Shimmerz spray over my Tim Holtz masks on some kraft cardstock from Hobby Lobby. After it dried, I stamped on the various images from Tim Holtz. Then I added my Happy Birthday using Versamark ink and an Inkadinkado stamp set embossed with jet black embossing powder. I tied on a grossgrain brown ribbon, and then added a button with Making Memories twine. I matted the finished piece on black cardstock and adhered it to the front of my kraft card base. I hope he likes it -- even if it is a couple of weeks late.
Okay, lastly, -- promise not to laugh! I mean it. Is a Father's Day card. I know. You are cracking up now aren't you? Well, I had the card front partially made, and I decided I should finish it...finally... I used the same technique as above for the card front. I used stamps from Inkadinkado and Papertrey, Ink.
Okay, we are back up-to-date on my projects. I am working on a cool video (well, at least I think it is cool - haha), for making flowers using regular old textured cardstock and Copic airbrushing. I am pleased with my test flowers. I can't wait to use them on a project, and share the video with you!
Posted by BoxerBrats at 12:00 AM 0 comments
Labels: birthday cards, buttons, Christmas, cricut die cuts, father's Day card, foam dots, Glimmer Mist, glitter papers, glossy accents, ribbon, shimmerz spray, stamping, twine
Tuesday, August 24, 2010
Christmas Card Day 23
Today's card features a die cut from Cricut's Winter Frolic Cartridge. This little reindeer has a lot of of small pieces to make him so cute. I used three different glitter papers and some shimmer Core-dinations cardstock. Throw in a Cuttlebug embossing folder (bottom - circles) and a Sizzix Embossing folder (top - snowflakes).
I am going to have a whole line of critter cards by the time I am finished with my challenge :)
Posted by BoxerBrats at 11:31 PM 2 comments
Labels: Christmas, Christmas Cards, cricut die cuts, Cuttlebug, glitter papers
Monday, August 23, 2010
EDCCC Catch Up Post
I haven't been feeling well lately, and I have fallen behind on posting my cards for the Every Day Christmas Card Challenge. I have gotten my cards done, but I didn't get them posted to my blog.
Day 21
Day 22 - Bonus Challenge to include an animal on your card
And today's card ~ a Waterfall Card
I was away most of the day Friday for the funeral of a very close family friend. I made a card for the family. Our friend was my auto shop teacher (yes, I did take auto shop), and he loved vintage cars. One of my favorite younger pictures of me has me standing in front of one of his classic cards.
Here is the card I made~
Okay, I am back up to date with my posts~
Posted by BoxerBrats at 11:27 PM 1 comments
Second Chance Drawing
Unfortunately, the winner of the second blog candy never claimed her prize so it is back up for grabs today. I should have done my new drawing on Saturday, but unfortunately, a close family friend passed away. I was gone for the funeral, and it took me a couple of days to get back into the swing of things. So without further delay, the next number drawn was 24:
Melinda AKA medialady said...
I love the card! It is beautiful!
I am now following your blog and only quality for #2 since I don't have a blog of my own (I don't have the time since I am always checkout everyone else's blogs - lo1!
Congrats Melinda! Please contact me at boxerbrats at gmail dot com to claim your prize!
Thanks again to all that played along with our blog hop!
Posted by BoxerBrats at 4:06 PM 3 comments
Friday, August 20, 2010
Every Day Christmas Card Challenge #20
Well, this is my last entry for the challenge over at the Paper Variety. This card was pretty fast to make, but I am super happy with how it turned out. The embellishment was in a variety pack of Jolee's establishments that I found on a recent trip to Micheal's.
For this card I picked out three embossing folders and three solid papers with white cores. I embossed each one with a different folder, and then I trimmed it to fit my card base (which is 5.25" x 5.25"). To make it easier to adhere, since I wanted the add the piece with foam dots, I mounted the embossed pieces on cardstock square that was approximately 4.75" x 4.75". The finished embossed piece is 5.0" x 5.0".
I added the Offray Ombre Ribbon. I then mounted the finished piece on my card with foam dots. I added the Jolee's embellishment and the Thickers Alphabet Stickers - Jewelry Box in Cocoa.
This was the kind of easy card that I needed to complete tonight. I just got home from the funeral of a very dear family friend and teacher of mine. It was an emotional day. I am grateful to have had the opportunity to have loved and lost this wonderful person rather than to never have known him. RIP~ Jimmy. You will be missed.
Posted by BoxerBrats at 10:07 PM 2 comments
Labels: Christmas, Cuttlebug, embossing, foam dots, Jolees stickers, ribbon, Sizzix Embossing Folders, Thickers
Thursday, August 19, 2010
Every Day Christmas Card Challenge #19
Today's card is slightly scrap-lifted from a card I found in my new issue of Paper Crafts Magazine. Theirs was done in all red on white, and it was great. Howevery, I had to change it to make this card mine :)
The paper is from PinkPaislee and the Solid cardstock is from Core'dinations and ColorBok. The poinsettia was a gift from a swap. The sage brads are from Making Memories. The stamp is from Inkadinkado, and the ink is from Memento.
The card base is 4.25 x 5.5. Layered with white cardstock cut at 4.0 x 5.25 The Patterned piece is cut at 3.75" x 3.75" The accent strip was cut at 1.5, and then punched with the Double Loop Punch from Martha Stewart. All edges were inked using Colorbox Olive Green Chalk Ink.
I hope you like it :)
~Laura
Posted by BoxerBrats at 9:43 PM 1 comments
Labels: brads, Christmas, flowers, Martha Stewart Punches, stamping, stamping chalkig
Wednesday, August 18, 2010
Every Day Christmas Card Challenge #18
This is my card for Day 18. I love these papers together. The patterned paper on top is from PinkPaislee and the one on the bottom is from Imaginisce. The ribbon is from Offray. The embellishments are old buttons from my button box, a stick pen from Making Memories, and the sequin flower is from Prima (a beautiful prize provided by Peach Crop Shop). The stamp is from Recollections, and it was embossed with super fine white embossing powder. I rounded the corners with my WRMK corner chomper and the border punch is apron lace from Fiskars.
I think I may just have to enter this over at The Paper Variety. I am also entering it at ChristmasStampin's Blog. The challenge was to use two pattern papers from two different manufacturers. Lastly, I entered at A Spoonful of Sugar's Christmas in August challenge blog.
Posted by BoxerBrats at 11:35 PM 1 comments
Labels: border punch, Christmas Cards, embellishments, embossing, stamping
Tuesday, August 17, 2010
Every Day Christmas Card Challenge #17
WOW, I cannot believe it is already August 17th, and that I have 17 Christmas card done!
I learned something today. I should never emboss images before checking for stray embossing powder WITH my glasses ON! LOL I hate to admit it, but I now need my glasses for fine detail work. Okay, I said it. Enough about that!! (Yes, Dad, I finally admitted it).
I used my new Martha Stewart Border Punch today on this card. I stopped at Micheal's to pick up a stamp that a friend wanted, and I saw this border punch on clearance. I couldn't resist. I also picked up the stamp set that I used on this card. It is Merry Merry from Recollections.
The papers are kraft cardstock and Cosmo Cricket. The ribbons are assorted ones from Offray. The button is from my Great-Granny and Granny's button collections The twine I used was super white, so I aged it with some Colorbox Chalk in Warm Brown.
Thanks for droppin' in to check out today's card~
Posted by BoxerBrats at 11:32 PM 1 comments
Labels: Christmas Cards, Circle Punch, embossing, stamping, stamps














.jpg)


