
For today's challenge, I went for something a little different. I used an old clam shell package for a gift card holder. I scrap-lifted the idea from an item I saw using containers for gift card holders.
I think this was a holder for eyelets or brads originally. I used papers from Stampin' Up. I just cut a paper slightly smaller than my clam shell and rounded the corners. I stamped my "Make a Wish" sentiment on cardstock and highlighted it with chalk and cut it out using my scalloped circle punch. Those two pieces are inside the clam shell case.
 For the outside I stamped one of my favorite cupcake images on Prism cardstock and colored it with my Copic Markers. To get some texture for the icing I used the Sakura Souffle puff pens in pink and white. I sprinkled them with some pink iridescent glitter before the inks dried.
 I punched out the cupcake using my circle punch (approximately 2") and then punched my cardstock out in a slightly larger circle and then scalloped circle. I used alternating sides of the Stampin' Up designer series cardstock.
I hope you enjoyed this card. I would love to see any variations anyone comes up with on this idea. I think it is great for recycling!
Tuesday, March 09, 2010
Day 9 - Altered Art Gift Card Holder
Monday, March 08, 2010
Tonight's Card ~ Thanks to Hailey!

Tonight's card is a bit different. The idea came from a Stampin' Up tutorial on YouTube (click here) by Inkitupwithjessica. I really liked the concept, and this is my take on that card. I am not sure if you can see them, but there are three small pearls as the flight pattern of my butterfly.
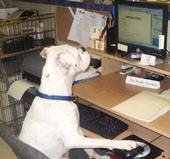
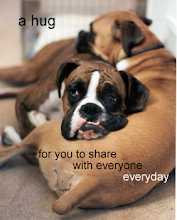
Hailey says she is the creative genius tonight, so here is a picture of her at my very messy scrap desk. Wow, I really need to get back to work on my organization plan!
Enjoy the card ~from the Boxer Brats team and Puggles, too! 
New Chicken Tractor:
This is where it all started. Six little baby chickens purchased last march. They were so cute, and so little. They did grow fast, though! We had our first eggs by July/August.
Back to the subject: Chicken Tractor.
I know you are saying, "Gosh, Laura, what the heck is a Chicken Tractor?" Okay, maybe your response is more colorful than that. LOL
A chicken tractor is a mobile chicken coop that you can move around your yard and/or garden areas. The chickens "work" by scratching the ground, eating the bad bugs, and fertilizing the ground all at the same time. Do you know how much bags of chicken poop cost at the farm supply store? LOLI have been researching online for months trying to figure out something better for my six chickens. I really didn't think I could build their house, runs, pens, etc., but I surprised myself and with the help of my parents and my husband, I have created several now over the past year.I am happy with the chicken coop. I am going to make a few changes to the inside, but I am pretty satisfied with what I did. It isn't a masterpiece but it is very solid and serves its purpose. I just need to get it painted.
The first chicken "pen" was so very white trashy for lack of a better term -- no offense to anyone, but it is the only sort of politically correct description I can thing up right now. It was PVC pipe stretched with chicken wire, and it was about 6' tall so I could walk inside to change their water and feed them. It looked like an eyesore in my backyard, but it was functional. After about 8 months in one place, the chickens had definitely eaten every bug and blade of any weeds or grass. In fact, the area started to become a toxic wasteland.

I got the bright idea I would just go "move" it. Well, enter me with fibromyalgia and a knee injury out trying to move a huge pen and chicken coop. Yup, you guessed it. Disaster! The pen collapsed, but the house was fine. I finally got some help to move the house to a new location, and then I set about building a new pen that wasn't so offensive to look at. Home Depot here I come! I went with wood over PVC pipe this time for strength and because I thought it looked better. I went with a much lower pen this time, and made a door on top to access the feed and water. WAY better!Next I build a portable smaller version that I could easily move around the garden and yard. Now the girls can work all day, and then go home to "roost" at night. I think they love it. I went from 1-2 eggs a day to 3-6 eggs per day. I am averaging 4 right now. Not bad for so few chickens.
It is difficult to see the smaller tractor in the background. The longer one in the front is actually their everyday pen. I made a door for it, so they can go in and be moved about the yard. When their work is done, I move them back over to their house. I have two small water and feeders attached for when they are "on-the-job". I did the same thing with the smaller tractor.
I think I am going to go try to find some small wheelbarrow wheels to add to make it easier to roll about my very uneven property.I must introduce you to the Puggle Crew. Hailey and Pugsley are my official Chicken Rustlers. Whenever one escapes, they quickly corner and put a paw on the offender until I can come pick her up. It is rather humorous. I am so glad they are gentle with the chickens. I think they believe it is a really fun "chase-me" game!

The Rewards~ These were some of our very first eggs. Trust me this is the part that the dogs love the very best! They go crazy for their chickie eggies, as they are known around here.
Doesn't the new set-up look much more professional? I never made mitered corners before, and I didn't even begin to dream it would turn out so nice. We definitely are loving what my husband has named our "Pawseeland Eggs".
Winner!!
Vicki,
You were the only one interested in the stickers, so they are yours! I will contact you to get your mailing address!
Enjoy!
Sunday, March 07, 2010
More Butterflies~
Here is my creation for today:
I am on a butterfly card kick I guess. Let me know what you think!
Saturday, March 06, 2010
I hope you Dance~

Here is another card I created for our Every Day Card Challenge over at the Yahoo group Scrappin-n-Chattin. I love this butterfly sticker! Hope you like this card. I would love to hear your opinions!
Feminine & Masculine Cards

The Butterfly Card was made with SEI papers, and a $1 stamp from the Michael's Bargain Bin. I love the glitter and glitz of the background paper. I stamped the sentiment on plain white cardstock with Memento Cocoa Brown Ink. I inked the edges with a Creamy Brown Cat's Eye Chalk from ColorBox. I cut some butterflies from the patterned paper to accent the sentiment. For the accent piece I cut a butterfly from the patterned paper and inked the edges using the same Creamy Brown chalk. I layered that using glue dots on other coordinating papers.
I love how it turned out.
For this card I wanted a more masculine feel. These papers are also from SEI. I used a Sketch by my friend Abby over at Scrappin-n-Chattin' group on yahoo. I inked the edges of my patterned paper strips using Chestnut Roan Creamy Chalk Inks from ColorBox. I used another $1 stamp from Michael's for the sentiment, and I stamped it on the coordinating cardstock from this line. I used my Making Memories Slot Punch to cut the ribbon slit in the card fold. I used Scor-Tape to secure the ribbon then tied it with coordinating twine. I used my Copic Markers to fill in the parts of my stamped image that didn't stamp well. I inked the edge of the stamped image with my Chestnut Roan chalk, and then mounted it on a coordinating cardstock sticker using a pop-dot. The epoxy accent is also from SEI. I like this for a great simple masculine card.
Sizzix Winner!
Well, it is a little past midnight. In my defense, I fell asleep in my chair LOL. I had to rush to finish a card for a challenge. That meant the drawing got pushed back. I think it is okay. There aren't many night owls like me out there.
I employed the help of Random.org to assist me in the drawing. Pugsley and Hailey just wanted to sleep and not pick a darn number for their mama. Scooby is too mature for such games ~LOL~
Drum Roll, Please:
True Random Number Generator
Says:
1
Congratulation, Barbara! You are the lucky random generator winner! I hope you enjoy them!
Friday, March 05, 2010
Random Act of Kindness~

Well, I am really trying to embrace the open hand to giving to allow the heart to be open to receive.
I have been giving away a lot here at home via Freecycle, Craigslist, etc. I want to share with my scrapping friends as well.
Today I am offering 4 sticker packs from Stickabilities. There are a few stickers missing from the graduation package, but there is one full sheet still there. The second sheet has a few gone. I used them for a card. These were given to me when I was working on my step-son's high school album by a very kind fellow scrapper. I ended up not being able to match them with the papers I was using. I am grateful for the gift, and because of this I want to continue to share.
These stickers really are great for high school scrapbooks. The one is all high school sayings. Another sheet is all graduation, and there is a quotes sheet.
Please leave a comment INCLUDING a way to contact you (blog, email, list pal, etc.). This giveaway will go until Sunday night at midnight ~ Sunday, March 7th, 2010 to be specific LOL.
Nothing fancy. Just let me know you want to win. You are welcome to share any giveaways on your blog, but it isn't required. I would love more hits and followers, but it is up to you if you want to share~
~Happy March!
Thursday, March 04, 2010
Spring and fun Birthday Card~
I just fell in love with this image. I received it from a friend, and I hadn't had the courage to color it in. After reading Wendy's Copic Monday posts, I decided I could do it. I got out my Copic markers, and finally took the plunge. I am so happy with how it turned out! Blending with the Copics was so much easier than I even dreamed it could be.
Now back to the project! I used basic white cardstock for the base. I used my corner rounder on two corners. I cut my patterned paper 1/2 smaller than my card base, and rounded two corners as well. I found some coordinating ribbons, and made my "bow" by tying one section in a knot around my longer piece of ribbon.
My card image was stamped using Memento Black Ink. I used my Copic Markers as follows:
For her face, I used E000, E00, E11, E21, and R20.
For her hair I used YR23, YRo4 and E25.
For her shirt, I blended down V93 to V17 for a slight tie-dye effect.
For her overalls, I used B97 for the darker shading, then B91 and B93.
For the flower I used Y000, Y11, and Y13. For the center I used YR04 and E29. I then added Diamond Stickles over the top for some sparkle.
For her tennis shoes, I used RV21 RV02 and Rv21.
I used my Copic Liner pen .03 to darken up the lines that weren't stamped perfectly, and to add the lines on the tennis shoes.
I used my Peebles Chalks in Basic Brights to color the edges of my image and then mounted it to a piece of coordinating cardstock using my Glue Glider Pro. I rounded the corners, and then I edged the cardstock with my chalks.
I used my Glue Glider Pro to mount the image to my patterned paper, and then I used my Scor-Tape 1/8 inch to adhere my ribbon to the patterned paper. Next I mounted it all to the card base using my Glue Glider Pro.
I had some cute little alphabet stickers laying around that I used to add the name of the recipient (my husband's first and only granddaughter, Emily)
On the inside, I stamped a cupcake image on my Prism white cardstock using Memento Black Ink. I then used more of my amazing Copics to color my image.
For the cupcake paper, I used G20, G24 and G82.
For the frosting, I used Rv21 and R23
For the candle, I used V93 and V95.
For the flame, I blended Y11 with YR04.
For the dots around the cupcake, I used YR04.
I mounted the finished image on my cardstock cut in a scalloped cirlce using my Spellbinders Circles. I colored the edges of both cut-outs using my Pebbles Chalks in Basic Brights.
I added more of my lettering stickers, and a chipboard "1" for "Happy First Birthday". On the back I had to add my namesake boxer dog image using my Glue Glider Pro. I decided to try something different. I used stamped my handmade stamp using Versamark ink, and then colored it using my Peebles chalks. I used my Copic .03M Black liner marker for the lettering.
~and that is my finished project.
Many of the products used in this project are available from Cutter's Creek:
Copic Sketch Markers:
E000, E00, E11, E21, R20
YR23, YRo4, E25, E29
V93, V95, V17
B97, B91, B93
Y000, Y11, Y13
Copic Liner pen .03
G20, G24 and G82
Rv21, R23
Glue Glider Pro
Peebles Chalks in Basic Brights
Scor-Tape 1/8"
Prism White Cardstock
SIZZIX GIVEAWAY!
Manila Envelope
Eyelet Washer
Scalloped Oval Circle

Yup, you heard it right!
I am giving out Blog Candy! You can win THREE Sizzix Dies in perfect condition!
(I may have used them once or twice, but they are all in great condition. One of the cases is cracked.)
Times are really tough right now, and the same is so true at my house. I can't afford all of the goodies I would love to have for crafting, but I realized that I have a lot of duplicates, things I don't use as much as I use to, and well you know how it goes. I decided that it was time to spread some joy around.
I figure if your had is open to give, it is also open to receive. I am giving blessings out, and leaving myself open to receive blessings in return whatever those blessings may be~
Leave a comment on my blog, and you will be entered to Win! No purchase necessary! No posting necessary! Just leave a comment about why you would love to win~
Deadline to Enter is Midnight March 5th, 2010. If you are not a regular blog follower, or friend, please leave me a way to contact you if you win! If the winner doesn't respond within 24 hours of being notified, I will draw a new winner! I need to be able to contact you to mail the prize to you, make sense??
Monday, February 22, 2010
Quick Cards
We all have those times when we just need a quick card to say, "Thinking of you". That is why I am so grateful for digital stamps and free images! We are lucky to have some amazing designer over at Cutter's Creek Design Team Blog who create fantastic images like the one I used in this card which are often available free! What could be better than that??
Anyway, back to the card. I started with a great sketch from my friend Abby L. at Scrappin-n-Chattin' on Yahoo groups. She is a very talented designer. Now, we all run into times we need a quick card. Card sketches and digital images can be a real time saver. You print your digi's out onto your cardstock using your laser or ink jet printers. Before coloring them, be sure to quickly heat set the ink with your heat tool.
I like to keep a basket of scrap papers just for quick cards like these. The leftover scraps from scrapbook pages can be perfect for your cards. Why waste those beautiful papers? Reuse strips for wording and accents.
For this card I used a free digi image from Sher over at Cutter's Creek. I colored it using my Copic Markers, and then I added a little bit of Diamond Stickles for the nose to give it a little pop. I hand lettered some leftover strips of cardstock, and added more Diamond Stickles to the heart on my lettering.
For quick cards, I always have big stack of white cardstock in 8.5" x 11" in my stash. That way I always have the perfect background. I cut my cardstock in half and then folded it for my card base. I cut one piece of cardstock at 4" x 5.25 inches for my background, so I could leave some white cardstock showing. Next I cut another piece of coordinating cardstock at 3.5" x 4.75 inches for layering. Then I cut another coordinating piece at approximately 3.0" by 2.25" and rounded the corners with my corner rounder. I chalked all of the edges using my Peebles chalks.
I layered my cardstocks onto my card base using my Glue Glider and then attached my colored digi stamp. I added my sentiment, and then my Skittles using my 3/16 Glue Dots.
In less than 20 minutes I had the perfect quick spring themed card ready to send to my friend to let her know I was thinking of her.
The products used in this project are available for purchase at Cutter's Creek are:
Copic Sketch Markers ( 0 Colorless Blender, E42, E09, E70, E30, RV02, 100 and R01)
Stickles Glitter Glue - Diamond
Glue Glider
Glue Dots
Peebles Chalks
Sher's Free Digi Image
Skittles
Sunday, February 21, 2010
Homemade Pizza

We started to order a pizza tonight from our favorite restaurant, but after figuring out delivery costs, I decided it was much more economical to make our own. I made homemade dough using my amazing Cuisinart Food Processor. This is probably one of my favorite kitchen tools right now. I made a homemade yeast dough, and boy did it turn out well. I am always afraid of making yeast doughs without using my bread maker, but this turned out perfect.
 While the dough was rising, I got the rest of the toppings ready. I made our sauce using, tomato paste, tomato sauce, freshly minced garlic and onions, basil, oregano, Italian seasoning, a little sugar and a pinch of salt.
We chopped and cooked up our favorite toppings, and in less than the time it would take for delivery to arrive, we had two fantastic pizzas! Two large pizzas cost us less than $10 to make including all the toppings and ingredients. We couldn't get one large single topping pizza delivered for that price.
It often seems like "fast" food is faster, but it really isn't. We got super fresh ingredients, and a pizza made just the way we wanted it in less time for a lot less money. Being frugal isn't so bad after all ~lol~
Challenge Yourself

At Scrappy Frogs Challenge Blog ~this week's challenge was to challenge yourself. Make a project you don't normally make, or use products you don't normally use. Maybe it is something in your stash that you have had forever, and you are "saving" it. Whatever it is. Get outside your comfort zone, and make a project that you don't normally make.
For me, I don't usually make altered items. I love them, but I don't make them as a rule. I thought it would be fun to make some altered tins for gift ideas. I had some Altoids tins that I had been saving in my "it can be used for something" drawer.
The first one I thought would be a fun Spring/Easter gift. I figured fill it with jelly beans or other fun small treats as a nice way to give a little gift to Some"Bunny" Special in your life. I just loved this stamp from the $1 bin at JoAnn's. This tin, I put some instant flavored coffees and some sweetener packets in it for a fun little friendship gift.

For me this challenge was a lot of fun. I used my new Copic Markers, and did some projects I wouldn't normally do. I hope you enjoyed them, and maybe you will find a fun project like this you want to do as a gift.
Wednesday, February 17, 2010
Valentine's Day Mailboxes


For the challenge at Scrappy Frogs Challenge Blog ~we did the little Target mailboxes. This cute little mailboxes sell for $1 at the Target Dollar Section in the front of most stores. I couldn't find them in stock at our store, so Mandie sent me one. Finally our store called a few days later, and they had gotten them in again. They were very popular for Valentine's Day.
I love these papers! They are from K&Company. I picked them up around Christmas time at TJ Maxx for under $2 for the full paper pack. They are foiled and glittered and oh so pretty!
The little roses were another fun idea. The centers are two hershey kisses. I chose the cherry cordial ones. I wrapped them in pink saran wrap, and then attached them to a florists wire using floral tape. I took apart a silk rose, and added it to the wires to complete my roses. Another idea I had later was to punch rose petals from decorative papers, and then add them in layers to make the rose petals. Maybe next time!
I sure hope my Valentine's liked their mailboxes and roses.
Sunday, February 07, 2010
Not So Happily Ever After ~~
For the Cutter's Creek Design Team - I am featuring this layout this week.
Sometimes we have pictures of those we loved in the past, but the romance didn't work out. The stories are part of our lives, and I think they should be scrapped, too. That was the case with this wedding photo. I had taken the picture out of the frame on my desk, but I didn't want to throw it away. It was beautiful. There were good and bad memories attached, so I decided the personal journaling needed to be hidden.
To start with I created a pocket on the back of the page using Scor-Tape around the two sides and bottom of the paper I chose (I used some scrap cardstock since it wouldn't be seen). Next I used my Storybook Cricut Cartridge to cut out my title in and the shadow. Since my cardstock was thick, I used the high pressure with the slow setting. I find this works best when cutting intricate items. I also cut my heart accent and shadow using the same cartridge. They may be hard to see, but I also cut some random marquee cuts from the Storybook cartridge to use behind my photo.
I really wanted a vintage, layered effect to capture the romance of that day.
Next I cut some random scalloped circles using Nestabilities and Spellbinders Dies. I wanted, again, a variety to obtain my layered effect. I inked the edges of each using my Tim Holtz Distress Inks in Rose and Tea Dye. They were so easy to soften using my blending tool and some scraps of flannel material.
I cut a square piece of cardstock for my "notebook" page approximately 5" x 7". I punched the border to mimic a notebook page torn out and inked the edges again using Tim Holtz Distress Inks to give it a vintage feel.
I raided my great-grandmother's and grandmother's button boxes for ribbon, lace, tulle, and of course buttons. I prepared my paper flowers using self-adhesive rhinestones from Cutter's Creek in ice blue, yellow/green, and soft pink.
I cut my butterfly from printed cardstock. I layered two together to get the dimensional effect using my Zig Two Way Glue Pen. I added in self-adhesive pearls in champagne to complete the look. The edges were tipped with Diamond Stickles.
To make the paper clip accent over my photo, I layered two small Nestabilities scalloped circles over a paper clip. I held them in place using a 1/2" Glue Dot. I chalked the edges using my Pebbles Shimmers Chalk. I attached two paper flowers using 3/8" Glue Dots and then added my self adhesive rhinestone center.
I also used the Pebbles Shimmers Chalks to accent my cut-outs. I really wanted a sparkly yet slightly vintage feel to the layout.
My photo is 5"x7". I cut the green cardstock mat 5.5" x 7.5 inches. I punched my photo corners, and adhered my photo using my Glue Arts Permanent Glue "gun". I used my Zig 2 Way Glue Pen to affix my heart and title die cuts to their shadows. Next. I began layering my cardstock pieces, Nesties cuts, laces, ribbons and tulle using my Glue Arts Glue Gun. I placed my photo and mat on the page using my Glue Arts Gun, and then I added my sewing trims around the photo mat using my Zig 2 Way Glue Pen. I affixed my flowers and buttons using my 3/8" & 1/2 " Glue Dots. I slid my paper clip accent over the photo mat and held it in place using a 1/2" Glue Dot.
Lastly, I added my title and heart cut outs using my Zig 2 Way Glue Pen. My final touch was the butterfly using a 3/8" Glue Dot.
I always change and use the adhesives that best suit my project and materials. The Zig Pen, Glue Arts Adhesives and Glue Dots are my favorite stand-bys for almost any project.
Lastly I typed out my story of how my marriage didn't end so happily ever after, but the day itself was wonderful and so memorable at the time. I did reminisce a bit about how we have such hopes and dreams one day, and how our lives can change in an instant. Since the journaling was so personal, I hid it in the pocket behind. I added ribbon to be able to pull the journaling up to read. You can see it at the top of the layout.
Products used in this project from Cutter's Creek:
Cricut
Cricut StoryBook Cartridge
Spellbinders Scalloped Circle - Small
Spellbinders Scalloped Circle - Large
Pebbles Shimmers Chalks
Ranger Diamond Stickles
Tim Holtz/Ranger Distress Inks
Tim Holtz Alcohol Ink Applicator
Self Adhesive Rhinestones
Self Adhesive Pearls
Glue Dots
Glue Arts Glue Gun
Zig 2 Way Pen
Remember, sometimes it is okay to scrapbook a love gone bad. It is part of what made you who you are~ Happy Valentine's Day!
Saturday, February 06, 2010
New Layouts!
I have actually been crafting again! It seems like it has been FOREVER! LOL I have joined a challenge to create a layout-a-day for the first 14 days of February. I know, it sounds easy, but sometimes you get so caught up in the idea of creating that you think it and over think it until you don't do anything!
I am loving the fact that it is forcing me to select the pictures and FINISH the layout no matter what. I have to get it done. This bit of pressure is a good thing!
Here are my first 7 layouts~ The pictures aren't the best. I used my iPhone instead of my fancy digital camera~ I will try to re-rephotograph them when the weather is better!
These first three layouts all will be part of a heritage album about my grandfather's side of the family. This is his cousin, Orphie. My grandfather's mother was Orphie's mom's sister, and his father was Orphie's father's brother. Wow, it sounds confusing but it isn't, really. It was so amazing to meet her!
This was taken at Paul and Sue Preston's 40th anniversary party. I re-met them again at my grandmother's funeral. It seems the first time we met, I was a little girl. I attended their wedding, and I barely remember it. In this first photo, it is Sue Preston, Donna Hudson (my grandfather's cousin), my grandfather, and me. We all look so somber, but we were really just deep in concentration and conversation. At the party, it came to light that Paul had never properly proposed to Sue. I guess he just showed her the ring, and she put it on. He finally got on one knee 40 years later, and he properly asked for her hand in marriage. He was lucky she still said yes ~his words not mine~
Anyone who knows me just a little bit, knows that I love my boxers completely. This is one of my all time favorite photos of my beloved boxer, Ruger, and hubby's boxer Browning (he was just a baby). Wow, I still miss them so much~
These are a few more pictures of our boxers -- Browning is in the chair. He loved laying down like that, and we use to laugh at him all the time. He was the only dog brave enough to jump into the swivel rocker-recliner. Below Browning is our honorary boxer -- our cocker spaniel, Uzi. Uzi was raised his whole life with the Boxer Brats, so we made him an honorary boxer dog. Lastly is Browning's brother, Winchester. We rescued Winchester when he was a year old. Shortly thereafter, we learned he was actually Browning's brother (same litter). This is another favorite picture. I think I have scrapped it before, but I loved how it looked with these papers~ I know it needs something else, but I still haven't figured out what it is.
Well, that is my first 7 days of layouts. Some I like better than others, but it has been fun to press the creative envelope so to speak! I will have more layouts to share ~check back soon.
Thursday, January 28, 2010
Great news!
Life has been a bit of a roller coaster lately, and I really don't want to get in to all that is happening to me personally. What I do want to share is a wonderful honor that I was bestowed today!
You are now reading the blog of the newest member of the Cutter's Creek Design team. For those of you who haven't visited the Cutter's Creek online store, you are really missing out. How often can you find a place where you get personal service on the web?!? Kim is amazing, and she carries so many awesome products INCLUDING COPIC MARKERS!! Copics are my latest obsession!!
I am really pleased to be allowed this opportunity. It has come at a wonderful time for me. I hope to be spending more time creating, and updating my creations on my blog as well as the design team blog.
Please check out the design team. I will update you when I post my first project!
The link for the Cutter's Creek store is in the side-bar of my blog if you want to check out the great little online scrap store!
Saturday, November 28, 2009
Drawing Update!
We have been SOOOOOOOOOOOO busy with family, Thanksgiving, and trying to get ready to go back to work! I haven't had time to finish filling the box, so that means a few more days to enter the drawing!
I will keep you all updated, so please get your names in soon!
Sunday, November 22, 2009
Tiz the Season of GIVING
I am putting together one of the large flat rate boxes full of scrapping supplies from my stash. Some items will be new in the box. Some items may have a sticker or two that has been used, but everything will be fun and usable.
Isn't getting a grab box fun?? Sometimes it is all the inspiration you need for a new project!
You don't have to do anything special to enter. I need you to leave a comment that you would like to be in the drawing. I will collect names until Thanksgiving, and I will draw the winner the day after Thanksgiving.
Be sure you leave a comment to be entered in the drawing! I don't' want to risk missing anyone's entry.
Happy Holidays!!!




 Posts
Posts







.jpg)


Such a great giveaway Laura. Thanks for being so generous and giving us a chance to win.
March 4, 2010 6:54 PM