Showing posts with label foam dots. Show all posts

Friday, August 27, 2010

More Cards to Share & New Video Coming :)


I am a bit behind, again, in posting my cards for the challenge.  I have been battling not feeling well for a few days now.  I have good times and bad times, as we all do.  It is just so frustrating when I am having troubles.  But now to the important stuff ~ the cards~!

The card above was really fun to do.  I used my new Winter Frolic cartridge that hubby picked up on eBay ridiculously cheap!  I love when we accidentally find amazing deals.  I cut the ornament using glitter cardstock in white, green, and silver.  The green went well with this polka dot background from Imaginisce's 2008 Snowy Jo paper line.  The chipboard is from Karen Foster Design - 2009 package.  The ribbon is from Offray.

I made that cool ribbon treatment using ScorTape.  It was super easy to do, and it looks so cool.  I was thinking this technique would look great on a shabby chic card.  I was thinking it would be cool to run a decorative or double stitch down the center of the pleats and then add buttons or something cool.


Now for today's card, I used the same die cut from the Winter Frolic cartridge, and I coupled it with a tree branch I found on there, as well.  I cut the ornament this time using my Imaginisce Snowy Jo paper line, and then I added the accents cut with white and silver glitter paper.  I set the ornament aside, and then covered the entire paper portion with Glossy Accents, and let it dry.  I only put it on the patterned paper.  I left the glitter paper un-covered.  I found that cool pine needle stamp on an Inkadinkado stamp set I had.  I traced the branch on the card in pencil, then stamped the needles, erased my lines, and adhered the branch.  I trimmed it to fit the card.  The sentiment was stamped using Bamboo leaves Memento ink on an oval cut from the Lacy Labels Cricut Lite cartridge.  I punched a hole with my Crop-a-dile, then added the twine.  I cut a small strip of plaid cardstock for the bottom (about 1"). I rounded the corners with my WRMK Corner Chomper (love this tool).   When my ornament dried I added it with foam tape, tied on the tag and added the ribbon.  I used foam tape to keep the tag in place.  Viola!  Day 26 is in the books :)

I also finished two card in my card pile.  I am super late on sending a birthday card to two family members!  I am so bad!  I finished the masculine card.  I do love how it turned out.  Most of the stamps are Tim Holtz stamps.  I used creme de chocolat Glimmer Mist and  baby's breath Shimmerz spray over my Tim Holtz masks on some kraft cardstock from Hobby Lobby. After it dried,  I stamped on the various images from Tim Holtz.  Then I added my Happy Birthday using Versamark ink and an Inkadinkado stamp set embossed with jet black embossing powder.  I tied on a grossgrain brown ribbon, and then added a button with Making Memories twine.  I matted the finished piece on black cardstock and adhered it to the front of my kraft card base.  I hope he likes it -- even if it is a couple of weeks late.


Okay, lastly, -- promise not to laugh!  I mean it.  Is a Father's Day card.  I know.  You are cracking up now aren't you?  Well, I had the card front partially made, and I decided I should finish it...finally...  I used the same technique as above for the card front.  I used stamps from Inkadinkado and Papertrey, Ink.


Okay, we are back up-to-date on my projects.  I am working on a cool video (well, at least I think it is cool - haha), for making flowers using regular old textured cardstock and Copic airbrushing.  I am pleased with my test  flowers.  I can't wait to use them on a project, and share the video with you!

Friday, August 20, 2010

Every Day Christmas Card Challenge #20


Well, this is my last entry for the challenge over at the Paper Variety.  This card was pretty fast to make, but I am super happy with how it turned out.  The embellishment was in a variety pack of Jolee's establishments that I found on a recent trip to Micheal's. 


For this card I picked out three embossing folders and three solid papers with white cores.  I embossed each one with a different folder, and then I trimmed it to fit my card base (which is 5.25" x 5.25").  To make it easier to adhere, since I wanted the add the piece with foam dots, I mounted the embossed pieces on cardstock square that was approximately 4.75" x 4.75".  The finished embossed piece is 5.0" x 5.0". 


I added the Offray Ombre Ribbon. I then mounted the finished piece on my card with foam dots.  I added the Jolee's embellishment and the Thickers Alphabet Stickers - Jewelry Box in Cocoa.

This was the kind of easy card that I needed to complete tonight.  I just got home from the funeral of a very dear family friend and teacher of mine.  It was an emotional day.  I am grateful to have had the opportunity to have loved and lost this wonderful person rather than to never have known him.  RIP~ Jimmy.  You will be missed.

Monday, August 16, 2010

EDCC & The Paper Variety Christmas Card~


Today's card is fulfilling two purposes.  It is my Day 16 for the Every Day Christmas Card Challenge at Scrappin' n Chatting, and it is my entry in Abby's challenge over at The Paper Variety.   Abby was looking for a card to scrap lift as part of her Christmas Card Challenge.

It is also my entry over at Christmas Stampin's Snowflake Challenge.

And my entry at Order of the Opis Gluei for their you've gotta move it challenge.


I decided to do a white on white layering card with added texture on texture.  The card base is smooth white cardstock.  The punched trim is textured white cardstock.  I used the Fiskars Apron Lace edger punch.  


I embossed one layer using my Sizzix Snowflake embossing folder, and then I outlined the snowflakes with an embossing pen.  I added a second embossing with super fine white embossing powder.  I love the extra glisten.

The snowflakes are made with a Sizzix Sizzlet die.  I also added Twinkle Jewels for a little added texture and shine.  The ribbon is from Offray, and the tag is an item I got in a swap.

If you click to enlarge the pictures, you can see all of the details much clearer.  I hope you like this simple and elegant card.


Sunday, August 15, 2010

Every Day Christmas Card Challenge #15


If you click on the close up of this photo you can almost see the embossing on the transparency of this card.  I took the transparency and ran it through my Sizzix Big Shot using a snowflakes embossing folder.  Then I added the acetate snowflakes from Heidi Swapp and the rub-on letters and the ribbon from Making Memories.  The paper and chipboard accents are from Imaginesce.  The brad is from a swap, and I took the ends off of it and attached it with a small foam dot.


Sorry for the brief description.  It was a long day, and I need to feed everyone around here.

Friday, August 13, 2010

Every Day Christmas Card Challenge #13


Over at Scrappin' n Chattin' we are doing an Every Day Christmas Card Challenge.  I am going to have all my cards done in August! Yeah!  Today, we had an extra challenge -- include polka dots and plaid on your card.  For me this was easier said than done!  I struggled to find plaid paper.  I finally found a small strip of green plain in my scraps bin, and that was the starting point.


I used my Cuttle Bug 5 x7 Polka Dots folder to emboss the green DCWV cardstock.  I distressed the edges with my Making Memories Distress Tool (love this!).  The rest of the patterned papers are scraps from various companies - black polka dot - Quick Quotes, Red Polka Dot - SEI.  The tinsel fibers are scraps from a page kit I got so long ago.  The typewriter key letters are a throwback from the 1980's.  I tied them together with DMC Floss in black.  I popped the letters off the card using one and two layers of 3M foam tabs for more dimension.  The plaid piece is also popped off the card using foam adhesive.


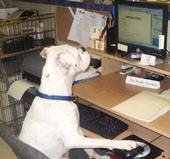
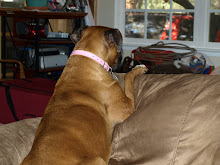
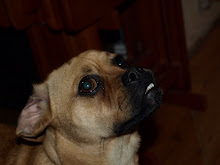
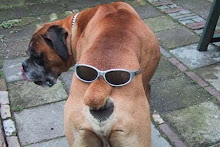
Hubby decided to sneak back in my craft room with the camera while I was finishing this project to snap some pictures of Hailey in her dog bed -- to compare with the previous ones of Scooby :)  Her is Miss Hailey in her scrappin' bed.

Hailey ~ Relaxin'
Scrappin' is hard work - I need a nap.
I don' see what the big deal is.
This bed is Puggle approved!

This bed is perfect for a boxer -- really!


Friday, August 06, 2010

Merry Little Christmas Deer


After I finished the card I posted yesterday, I started really looking at my patterned paper. I noticed the little reindeer looked an awful lot like the deer on the Create-a-Critter Cricut cartridge. I knew I had to make "her" for another card.

Again, I started with a standard kraft paper card. I stamped my sentiment using ink and fine white embossing powder. I cut the larger strip at about 2.5" x 5.25". The accent piece with my little deer was at 1.25" x 5.25". I inked and chalked the edges and put them together using my Glue Glider Pro. I had a little left-over piece of border sitting on my desk from another project, so I attached it to the bottom of my two strips. I added assembled piece to my card using 3M foam tape squares.

For my deer, I cut all of the pieces at 3". The shadow was gray paper. The base is black paper. Layer 2 is kraft paper, and the top layer is brown paper. I assembled the layers together using the Zig 2-way Glue Pen. I added Kaisercraft rhinestones in green and red for her collar. I used the largest size to give her a cute red nose. For her eyelashes, I cut a small piece of black cardstock using my Cutter Bee Scissors. I cut thin and fine strips to make her eyelashes. I added the pieces together using Glue Dots. Then I had adhered finished googly eye to my project.

I am having so much fun with this cartridge!

Items available at Cutters Creek:

Cricut Machine
Cricut Create-a-Critter Cartridge
Cricut Spatula
Kaisercraft - Red Rhinestones
Kaisercraft - Green Rhinestones
3M Foam Tape
Glue Glider Pro
Zig 2-Way Glue Pen

Friday, July 09, 2010

Girly Girl Card for My Auntie's Birthday & Scrappy Frogs Challenge Blog


For my aunt's birthday, I knew I wanted something very pretty and feminine.  I wanted it to be a special card she could display on her desk at work, and enjoy for a while.

I started by coloring my Magnolia image using my Copic markers.  For additional interest, I added Flower Soft to the sunflower and Glossy Accents to the shoes.  I accented a few places using my Inksentials white gel pen.  I set her aside to dry and went to work on the card.

My overall card is a 6x6.  The paper is cut at 6" x 12".  I scored at the 3" and 6" lines using my ScorPal.  My pink background layer is cut at 5.75"x 5.75".  I distressed the edges using my Making Memories edge distressor.  My floral paper layer is cut at 5.5" x 5.5", and again I distressed the edges.  I used my Glue Glider Pro to attach the papers, and then I sewed around the edges using brown thread (Gutterman).  I went around the edge twice being sure to make it look uneven and vintage.  I attached the completed piece to my card base.

Next I made the lace band.  The background is pink floral paper with white cardstock overlay, then pink cardstock, and followed by the white cotton lace.  I attached the completed piece to my card using foam tape squares.

The sentiment is from Papertrey Ink, and I stamped it using Versamark Ink then embossed it with pink embossing powder.  I die cut the sentiment out using my Sizzix oval bookplate die.  I chalked the edges with Colorbox chalks, and then cut a second die cut using the pink cardstock.  I layered the bookplates together using foam squares.  I added flowers from Prima and American Crafts accented with Martha Stewart pearls.  The pink/lavender pearl is from Michaels.


My Magnolia was dry, so I cut her out using my Cutter Bee scissors, and added her to the card with foam tape.


For the inside, I cut another piece of pink cardstock and distressed it like the front.  I used a smaller piece of floral pink card stock for the center, also distressed.  The labels were cut using my StoryBook Cricut Cartridge (Real Size Dial set at 4" for the large and 2.5" for the small).  I embossed the smaller one with my Cuttlebug Swiss Dots folder and then used my Colorbox chalk inks over it and on the edges for dimension.   On the larger one, I just inked the edges. The birthday cake was stamped on several scraps of cardstock using the Colorbox Chalk ink.  I added Stickles for dimension to accent the details.  I stamped the candles on white cardstock using the same inks, cut it out using my scalloped circle punch, and then colored my candle flames with my Copic markers.  I then put Stickles on top for more candlelight sparkle.  I cut out each section of the birthday cake from separate papers for layering.

For the accent bar to hold the easel part of the card, I cut a strip of white cardstock then embossed it using my Cuttlebug Swiss Dots folder.  I set it aside, and cut a smaller piece of floral paper and distressed the edges.  I cut another piece of pink cardstock, then covered it with a piece of satin ribbon using my ScorTape (it is so great for ribbons).  I layered the pieces together using my Glue Glider Pro and my foam tape squares.  I added the pearl strands using Beacon 3 in 1 adhesive.

I stamped the Birthday Wishes from my Papertrey Ink stamp set on a scrap piece of pink cardstock with my Versamark Ink and then embossed it with the pink embossing powder.  I then freehand cut it out using my Cutter Bee Scissors.  I layered the pieces on using foam tape and then added the three Michaels pearls.


On the back I had to add my boxer dog.  It is an old Hero Arts stamp that I bought in the 80's (I think).  I stamped it using my Colorbox chalk ink on white cardstock.  I punched it out with my Creative Memories circle punch, then punched the larger circle with the pink cardstock.  I chalked the edges then added them to my card.

My aunt LOVED this card.  She was so happy with it.  I was really pleased with how it turned out, and it is so very girly girl!

Products Used from Cutters Creek:

Circut Storybook Cartridge
Brown and Sunshine Yellow Flower Soft & Flower Soft Glue
Cuttlebug Swiss Dots A2 folder
Prism (Bazzill) White Cardstock
Memento Black Ink
Colorbox Chalk Ink
Copic Markers
Inksentials Gel White Pen
Cutter Bee Scissors
3M Foam Tape
Versamark Ink Pad
Glossy Accents
Glue Glider Pro
Beacon 3 in 1 adhesive
Stickles Glitter Glue - Diamond
ScorTape
ScorPal
American Crafts Flowers
Core-dinations Cardstock


Misc Items:

Magnolia Stamp
Making Memories Edge Distressor
Papertrey Ink Stamp Sets
Hero Arts Boxer Dog Stamp
Cardstock - Making Memories, TLC & Misc.
White Cotton Lace
Prima Flowers
Martha Stewart Pearls
Creative Memories Circle Punch
Strand Pearls
Offray Satin Ribbon
Michaels Pearls

Thursday, July 01, 2010

Hummingbird w/ Basic Grey "Dream" Card


I received this wonderful papers from April for being Member of the Month at Scrappin-n-Chattin' on Yahoo Groups.  I love them so much!  I made this simple easel card using Kraft cardstock that my hubby picked up for me at Hobby Lobby.  I stamped the Hummingbird using an Inkadinkado stamp from Cutter's Creek.  I used my Memento Tuxedo black ink, because I wanted to color my image with my wonderful Copic markers.  I stamped the sentiment using a stamp from Studio G's $1 stamp sets.  I think I picked it up at Michaels.  I used the Versamark ink, and then embossed it using white embossing powder from Judikins.

Other fun stuff used:

Martha Stewart border punch and butterfly punch
American Crafts Rhinestones
Twine
Making Memories Edge Distresser
Pop Up Foam Squares - 3M

Since July is such a fun summer month, I want to start out with a small blog candy.  I will be building up more prizes all month long.  To enter, just submit your name on a comment below.  If you would like a second chance to win, add your name and link below.  Include a link on your blog to this post and giveaway.  You will receive a second chance in the drawing.  For three chances, follow my blog.  For FOUR chances, subscribe to my feed updates.


This candy will be 12 stamped Inkadinkado Fancy images to include butterflies, hummingbirds (the one used in this card) and others from this great stamp collection.  All images will be on Neenah or Prism cardstocks, and stamped with Memento inks.  They will be perfect for coloring with your Copic markers.

If my followers reaches 100 before the end of this giveaway, I will add more prizes!  What a great way to start month number two of summer!!

Tuesday, May 11, 2010

Father's Day Card


This card is definitely Tim Holtz inspired! I love his products and stamps. This card was inspired by a challenge to use masks by my friend Mel LaFavers for an Everyday Card Challenge. I have had my masks for a while now, but I haven't ventured out to use them.

For this project, I started with a 4" x 5 1/4" piece of kraft cardstock. I placed my masks randomly on my paper. I put my project inside a large paper bag before spraying them with my Tattered Angels spray in Creme de Chocolat. The paper bag was great to catch the over spray, and I had no real mess when I was done.


If you don't have masks, you can make your own using your Cricut cutting machine and cartridges. Use your imagination. Butterflies, flowers, or any image can be cut to be a mask. Attach them using repositionable adhesive. You can save them on spare acetate sheets to re-use. The sky is the limit!

Next I used Tim Holtz stamps and Memento Black ink to stamp random images on my card. Next I used another Tim Holtz stamp with Versamark ink and black embossing powder. I heat set it with my heat tool to allow the wording to stand out on my card. For my sentiment, I used my Inkadinkado Happy Days stamp sent to stamp "Happy Father's Day" on the card using Versamark ink and black embossing powder. Again, I heat set it with my heat tool.

I distressed the edges of my cardstock and mounted the card face black cardstock using my ScorTape. I added ribbon and a buckle for additional interest. I used ScorTape and a 3/8" Glue Dot to secure the ribbon and buckle. I mounted the finished piece on my card using Glue Dots Pop Up dots for dimension and shadow.

I love how this card turned out. It is rare that I make masculine cards, but I always seem to need them. I love how this technique turned out so rustic. I can see so many other uses for it as well. What a great option for some shabby chic feminine cards. I would love to see what you come up with using these techniques.

For products used, please check out the Cutter's Creek Design Team Blog.

Saturday, March 28, 2009

Lassen Layout

Lassen Park

Wow, it is hard to believe these pictures were taken in 1998! They are three of my husband's all time favorite photos.

The patterned papers are from We R Memory Keepers. The solid cardstock is from Die Cuts with a View. The buttons are from my great-granny and granny's button boxes. The butterfly stickers are from K & Company. The letters are Thickers chalked with a Cat's Eye in lime green. The chipboard/matboard pieces are from various sources.

All of these photos were taken at Lassen Volcanic National Park near Shingletown, California. My "hometown" so to speak. We took the kids there during their first official stay with us in California. There was snow on the ground still near King Creek. The photos overlooking the mountain ranger were taken at over 8,000 ft. above sea level.

I hope you enjoy these layouts!


Related Posts with Thumbnails